|
I decided to write my story of becoming a Gold Microsoft Learn Student Ambassador. This is one of my achievements as a volunteer engineering undergraduate here in Sri Lanka. One year long memories in the global ambassadors community are exciting and worthwhile. My work within the community was recognized and I was nominated as a Gold milestone achiever. My application to join the program was accepted at the beginning of the year 2022. The good news was emailed to me by the program team. The ambassador journey of mine began at this point. I’m sharing my experience with all the readers out there while having an intention of influencing the community around me and clearing the doubts of new ambassadors in the community including new, alpha and beta ambassadors. Happy reading!  I completed the onboarding process as quickly as possible. In my time, onboarding consisted of a unique set of tasks including setting up the Microsoft teams, joining the town hall call, etc. The excitement was always there with me. Then I advanced to the alpha milestone after successful completion of the microsoft learn module and actively participating in a league event. I was able to finish the technical onboarding at the same time. Can you imagine how excited I was at the time? Wow! I was just impressed with my progress. It motivated me to learn more about the program and contribute my best to the community. Program team provided us with a Visual studio code enterprise subscription including azure credit, linkedin learning voucher and many more. I’m keen on experimenting new technologies in my leisure time, because of that I utilized my credit in experimenting with azure services. Everything related to azure is properly documented in an understandable way. So, It’s not that harsh to start learning cloud with azure. The next milestone for me was beta. There were two challenging requirements to satisfy. One challenge was hosting a virtual event on a microsoft related technology vertical. I chose it at first rather than going for a social impact project league. I planned my event on Microsoft Power BI. It’s an integrated data visualization tool which facilitates most of the phases of data analysis process. I had been learning the tool for a while during a remote internship I completed as an intern data science analyst with the Plan4CO team. I followed the instructions given and scheduled the event on teams. I delivered an introduction to the data analysis process and demonstrated how to design a dashboard using Power BI to meet the requirements of a given task. 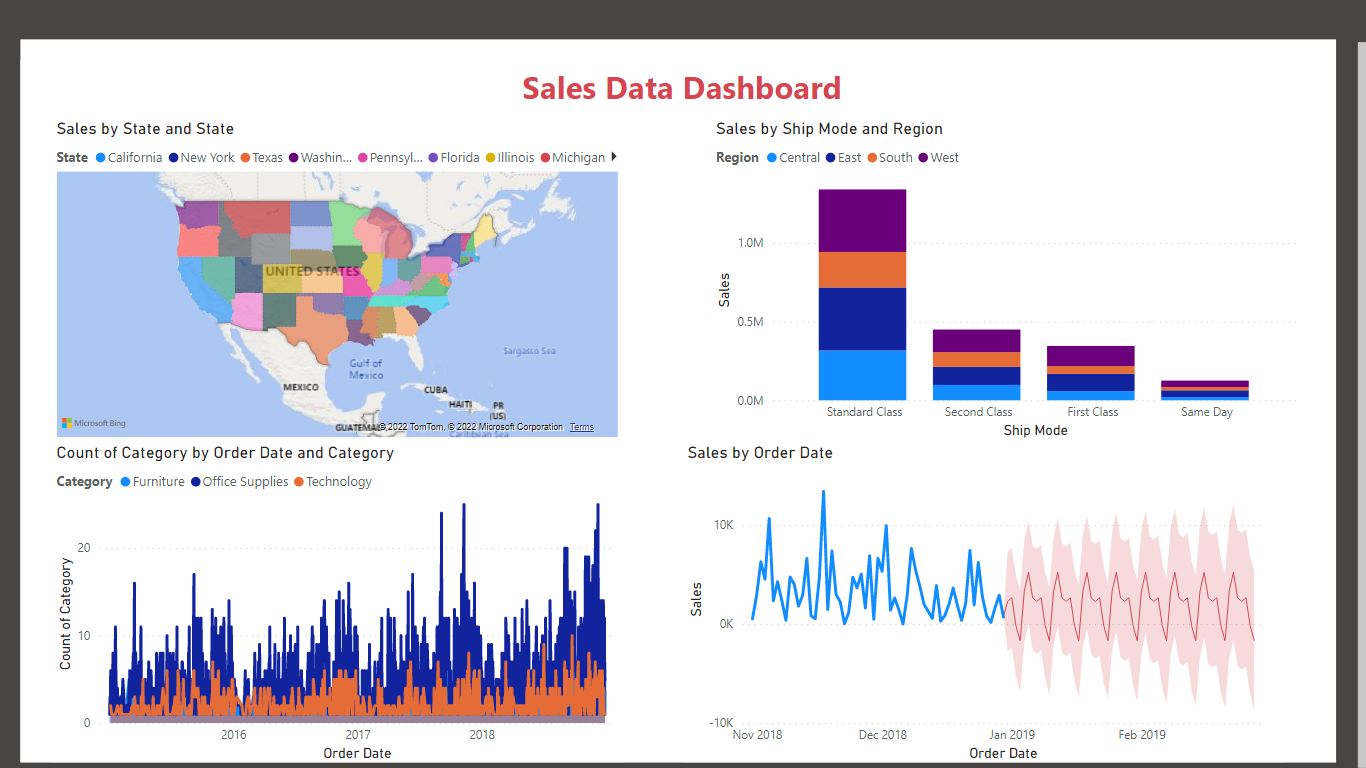 The pre-planning and marketing were challenging but I managed to reach the required level, but in the end things went bad. Somehow I missed the recording and the event didn't meet the requirements. Program team approved my event and encouraged me to organize another one to reach my milestone. It was a great experience for me because I realized that anything bad could happen at any time in life without even noticing them in advance. I moved forward with my second event. It was not as challenging as the first time hence I had already gone through it. I signed up for a peer-mentorship program and social impact project at the same time. My first social impact project was not successful but the mentorship event was a success. We all together organized and delivered a session on cloud computing. Our mentor helped a lot to make it happen. 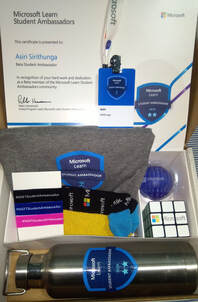 A new chapter of my ambassador journey began after I reached the beta milestone. I shared my achievement on social media. It is an excellent practice which motivates colleagues in your network. I continued participating in social impact projects as it improved my skills and introduced me to new enthusiastic friends living in different continents of the world. One of my projects was a blog series on Power BI and machine learning. I met many like-minded people while working with them on these projects. It was an opportunity of a lifetime. Microsoft offered Credly badges in recognition of each member’s contribution. I’m passionate about learning new technologies and applying them in solving real world problems. Therefore I utilized my spare time to learn and certified my competency in tech. The program offered me an opportunity to take the AZ-900 azure fundamentals exam for free. So, I referred to all the materials available on the learn page and went through linkedin learning courses relevant to the topic as preparations. I have shared my experience taking AZ-900 on medium as a separate blog.
In the latter part of the year 2022, I actively volunteered as an organizing team member of the Microsoft Ignite community lead after party of Sri Lanka, which was conducted as a hybrid event. Since the beginning of the planning phase, I worked with the Gold ambassadors of the community and shared and discussed my addons. I took the responsibility to share the event details among my university students. I used mostly social media and word of mouth. I found many potential candidates for the coming cohort who helped me to spread the news. In the physical event I gave my contribution as a track owner. Azure Infrastructure and Security was my track, and I had the responsibility to make that track an insightful one. It was challenging hence, this was the first event I contributed physically after the long break of covid-19 for two years. Reaching out to the speakers was one of my duties at the day. Some speakers participated physically and virtually from several parts of the globe. One of our MVPs joined from the Netherlands virtually. The full transition of the event raised some novel challenges but they were manageable with the help of my team. 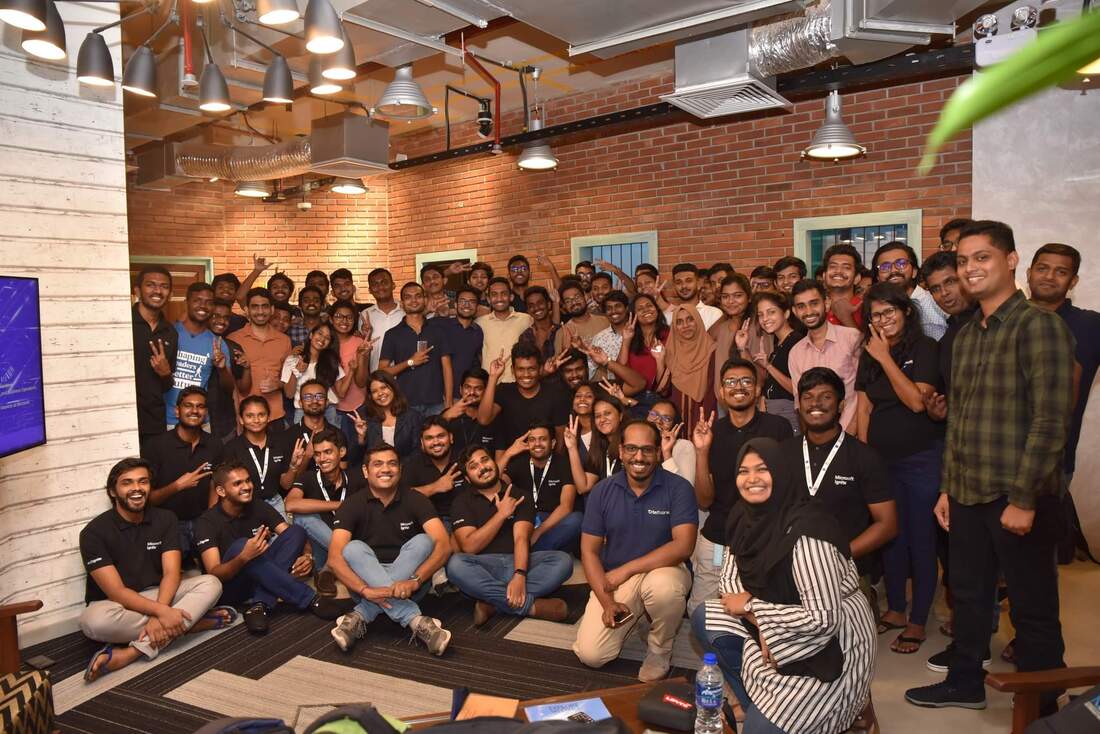 For folks who wanna join us, apply here https://lnkd.in/gWwDR-Vc and be a force for good.
Thank you !
0 Comments
FMEA
Failure Modes and Effects Analysis is a systematic and proactive method that is used to identify potential failure modes in a system and their causes and effects. In the 1950s, the US military use this method to create better weapons. Since then FMEA methods are eventually improved. We can categorize this into three types but it can be different than this categorization as well.
Step 1
Source:https://www.researchgate.net/figure/Product-hierarchical-tree-structure-diagram_fig2_301446979 Step 2 In this step we identify the potential failure modes. Always, It’s better to be open minded and creative. Ways assets can malfunction,
We would analyze the failure effect and cause. The robust detailed diagram we implemented in the step 1 makes this step easier. We have to consider both upstream and downstream affects.
The team should be involved in this step to be more accurate. We have to define a criteria for severity, occurrence and failure detection rankings. The most severe failure would have assigned the 10 on a scale of 0 to 10. Likewise, we define rankings for occurrence based on the probability a failure may occur. When it comes to the failure detection rankings, consider how easy or difficult the failure will be to detect with the control system. At last we assign these rankings to the identified failures. Step 5 In this step we calculate the risk probability number(RPN). RPN determines the critical level of a failure. RPN = Severity x Occurrence x Detection Step 6 Starting from the top of the RPN value list, We adjust the RPN to be lower by making improvements.
Step 7 After implementing improvements, redo the ranking and check whether they are below the critical level. If so, we can go forward. I’m more than happy to see the comments or suggestions. So, I can improve myself as well. Controlling a system is essential whenever it needs to full fill a relevant task as such. It's depending on the designer of the product. PID is one of the most common and perfect systems in control systems. PID gives us a rough idea about what it stands for. P for proportional, I for integral and D for derivative as such. Let me explain the idea of what I've absorbed from working with those basic things. What I wanted to build is a line following a smart car that used two proximity sensors to identify the white line on a black surface. I was trying with several controlling methods implemented on my own, They worked properly as well but my robot was too slow. After that I got to search for a controlling method via the internet it was found the PID controlling system for me. PID is a close loop feedback system which was full filled my requirements with a nice speedy robot. I thought that it would be better to share with what I've grabbed from them with you as well. You will find lost of diagrams its basic theories rather than getting deep understanding. So this is it. First of all, this will be based on Arduino but the concept can be used in whatever your using platform. When you are using PID there should be a set point. What we are going to do is our system control at that set point. There would be three conditioned, 1. Under-damped - This kind of system is oscillating over a long period so it's not good for systems with rapid response. 2. Over-damped - There won't be any oscillation but this needs a longer time to get to the set point. 3. Critically-damped - This is what we have to use it will be set with less amount of time and it gives us the perfect outcome of the system. Output = Kp*(error) + Ki*(cumerror) + Kd*(rateerror)Kp - Proportional constant Ki - Integral constant Kd - Derivative constant Copy Of the Arduino Code: 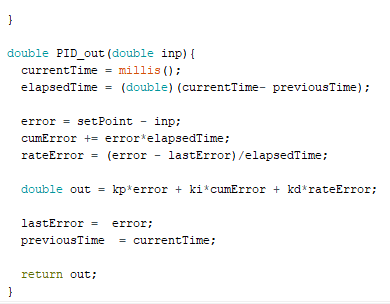 I’m gonna tell you how to set up your Raspberry pi using windows personal computer. The best thing about this story is you don’t need an external monitor. So let’s start. Components 1. Raspberry pi 2. MicroSD card 3. SD card reader Step 1 Initially we have to have a Raspbian bootable device. What we are going to do here is make our microSD as a bootable device. First we need to download Raspbian image from the official website [www.raspberrypi.org/] .Then extract it into your computer. We need an etcher to flash the image into our SD card. You can you any tool you prefer to do this [https://etcher.io/] . Connect your microSD card by using the SD card reader to your machine. Then flash the image into it. At last Open the SD card from your file explorer the drive will be labelled ‘boot’. SSH access is disabled by default. So make an text file named ‘ssh’ inside the boot folder. Now you are done the first step. Step 2 The next step is connecting to your network. Before that we need to configure our device. Download and install notepad++ [notepad-plus-plus.org/download]. Then open notepad++ and open a new file. Then navigate to edit > EOL Conversion and Make sure Unix (LF) is selected. It should appear disabled if it is. Paste the following code into it. country=IEctrl_interface=DIR=/var/run/wpa_supplicant GROUP=netdevupdate_config=1network={scan_ssid=1ssid=”Your-SSID”psk=”Your-PSK”key_mgmt=WPA-PSK} Replace Your-SSID and Your-PSK according to your router. At last, Select File > Save as, navigate to your boot drive and call the file wpa_supplicant.conf. You're almost finished with the setup. Step 3 In this step make sure your computer is connected to the same network as your Raspberry Pi. Log into your router and find the ‘IP address’ of your Raspberry pi. There are few other ways to find the IP address after connecting the Pi to your network. Your free to chose any. Finally what you have to do is install putty [www.chiark.greenend.org.uk/~sgtatham/putty/latest.html] to communicate with your board via SSH. Fill the fields and make sure to replace IP address field accordingly. 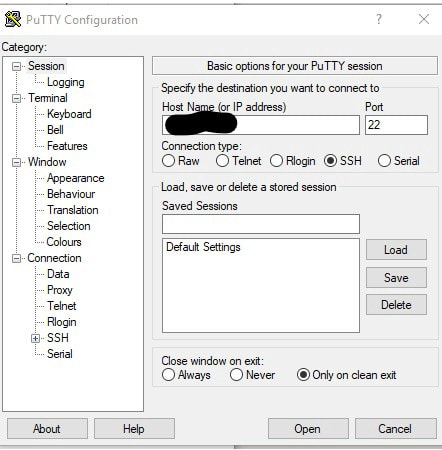 You can configure the board by running sudo raspi-config.Now you have the IP address of your device hence you can use any interface you want VNC Viewer can also be used to get and GUI.
|
AuthorI'm Asiri. Electronic engineering Student. Archives
April 2023
Categories |
 RSS Feed
